Myweblogin Knowledge Base
Setting up your website is quite straight forward and there are 6 steps to choose a design, add categories, add initial payment details and add an initial product.
There are six easy steps for your to follow to get up and running and they are:
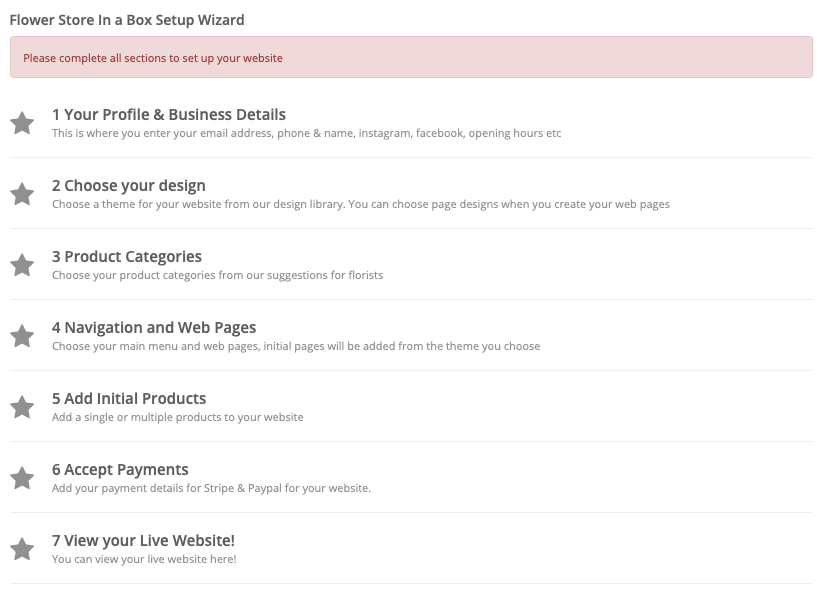 As you move through each step the step will turn Green so you know that you have done that step.

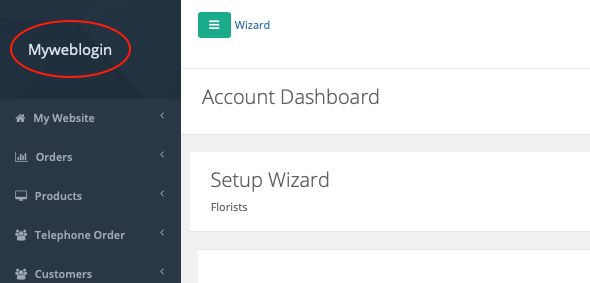
You can always return back to the main wizard steps at any time by clicking the myweblogin logo in the top left hand corner:
Your Profile & Business Details
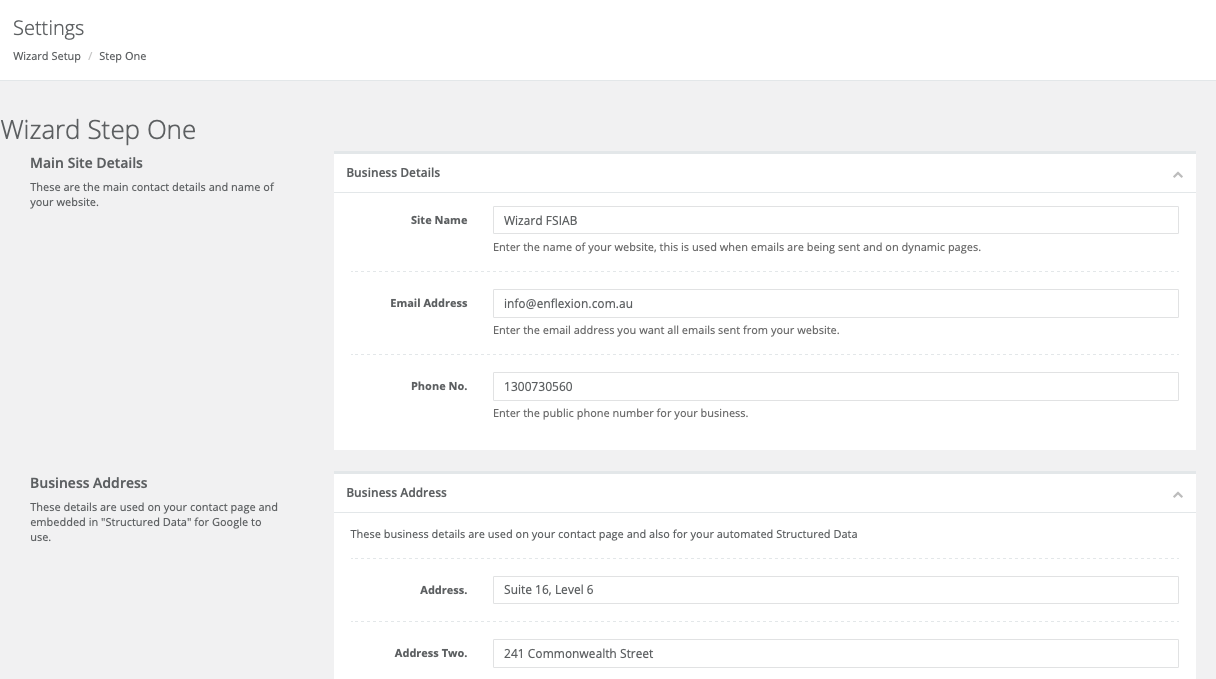
Enter the main details about your busines in the forms and then save. These details are important as they are used on your website on the contact page and also in "Strcutured Data" for Google pick up.
These include:
- The Name of your website
- Admin Email Address
- Business Opening Hours
- Physical Address of the store
- Social Media Links
These details are all used in your design and contact pages so please ensure they are correct.
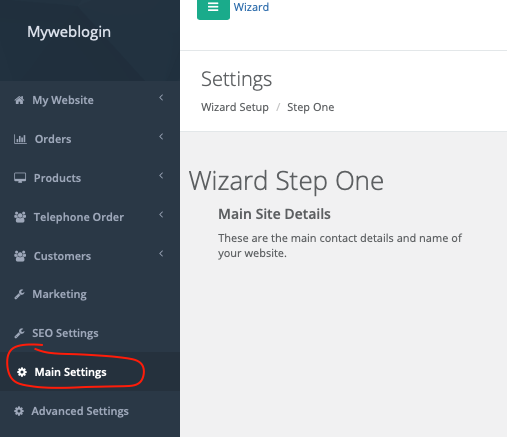
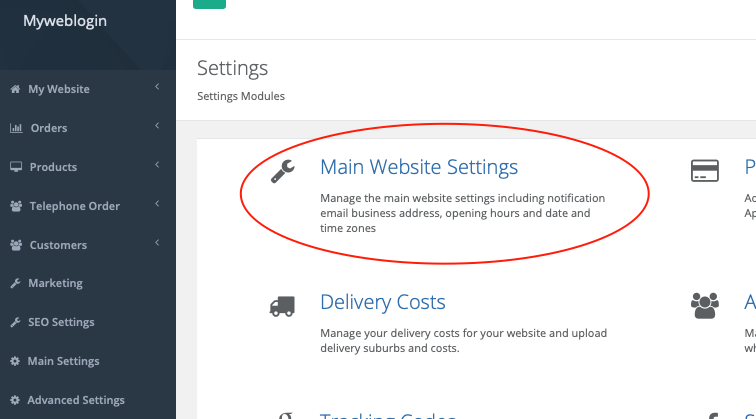
You are still able to edit these details later under Main Settings:
Choose a Design
We have predesigned 5 main layouts for you to choose from and we are currently working on more. Each layout can be extensively customized with your own:
- Logo
- Banners
- Products
- Product categories
- Content
- Marketing Messages
To get started you can click on each layout and view the homepage and the mobile version.
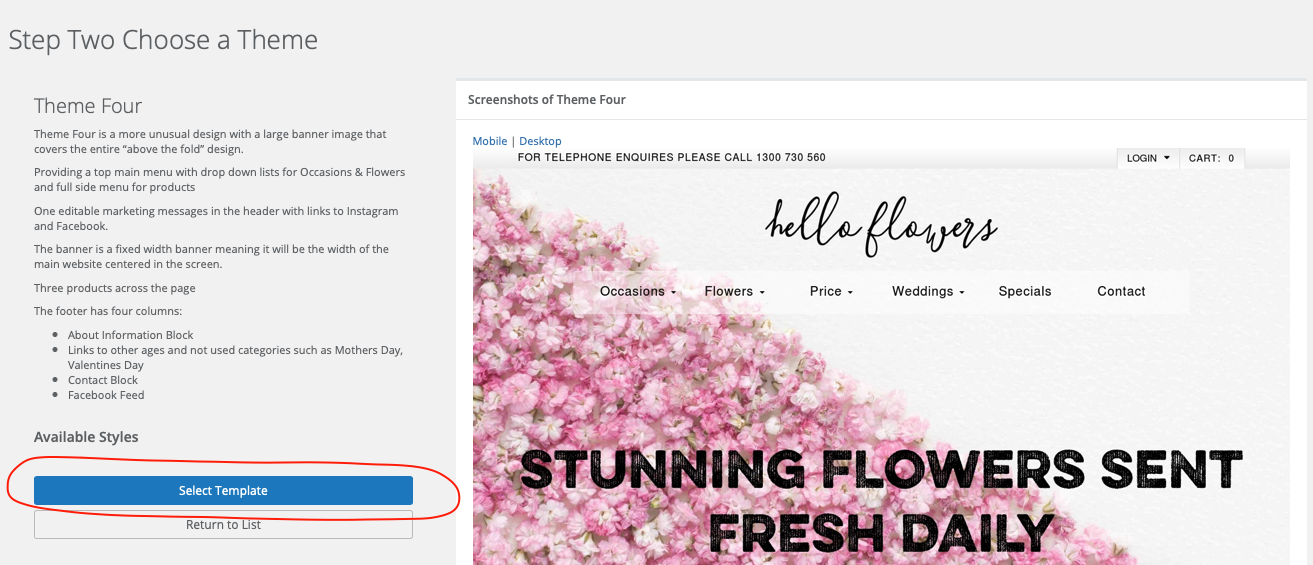
To choose a Layout click the Button Select Template.
This will now overwrite any existing web pages or content with the pages shown on your selected template so make sure you dont have any content that you will need!
Product Categories
Choose the product categories you would like on your site or you can enter your own custom ones. WE will automictically add special event categories for Mothers Day, Valentines day and Christmas.
There are two types of categories:
Occasions:
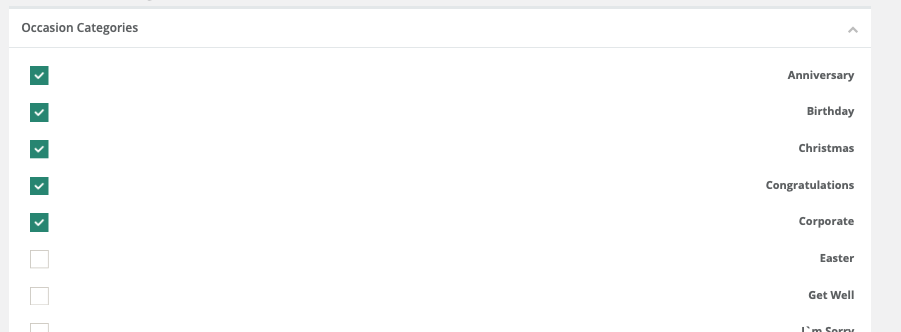
These are the most popular florist categories that customers search for when on florist websites.
Flowers

Custom
You can enter custom categories for your website here:
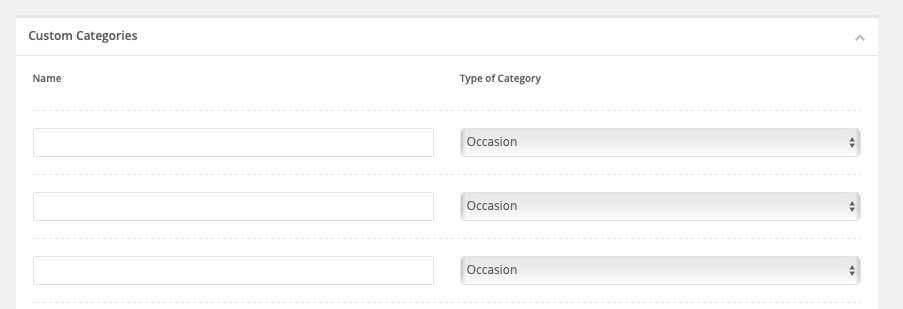
When choosing a custom category please choose whetther you would like the catgeryu to be listed as an occasion or flower.
This also affects how a category name is used to create the link. For example and occasion link will be created:
https://www..domainnam.com/occasion-flowers/
where a flower category will be created as:
https://www.domainname.com/flower-flowername/
Occasion and Flower Categories can be included in automated drop down menus in your navigation. You can also further manage your categries easily in your dashbourd including:
- Updating Metadata
- Making a category Visible or Invisible
- Changing the order of a categry in a menu
- Making a category only available for future day order.
You can manage your categories in the products menu:
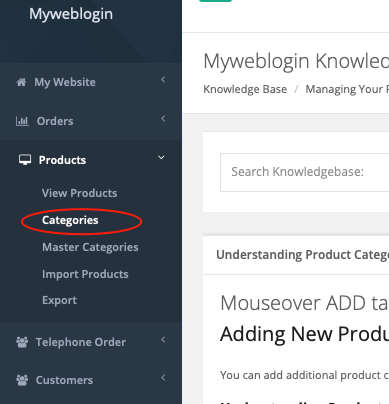
You can read more about categories here:
Navigation and Web Pages
The menus are pre-suggested for you from the layout you have chosen, you have ability to edit the menus adding new pages, links and categories to suit your needs:

You can manage either your main menu or your footer menu by clicking the button to the left hand of the screen.
Adding mew menus and pages
To add a new menu option click the blue button add a new menu then choose what type of link you want to add:
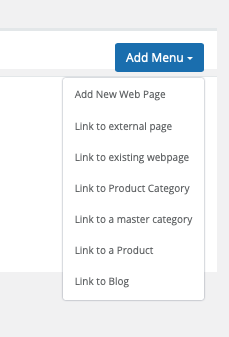 Then fill in the form and the menu will be automatically added for you.

The Menu Label is the text that is shown in the menu itself.
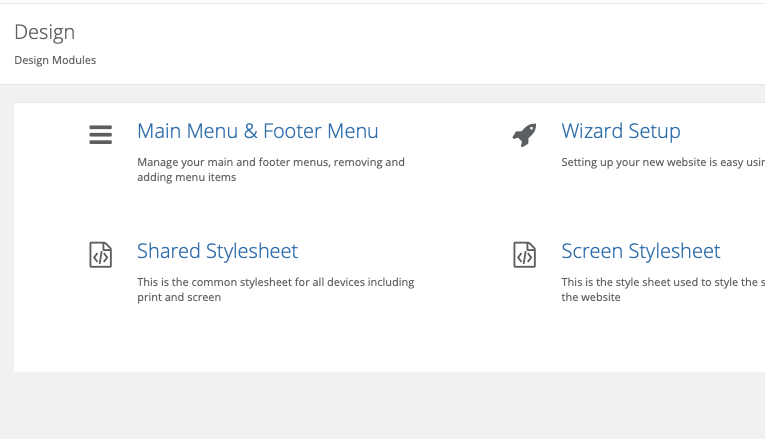
You can edit the menus at any time by finding the option under Design & Layout:
Add an initial Product
Add your first product from the wizard is easy, just fill in the form and choose the photo to upload. You can manage your entire product catalogue from the Products menu in the Left Hand Menu.
Start by entering a name for you first product:

Then choose a category or multiple categories for this product. By default it will automtcially be added to your homepage products.

Then Upload a photo of the product, you can add more later.

then enter a price AND a description for the price:

Don`t enter $ dollar signs in the price and always enter the descriptions or the price will be zero!
Then enter a description of the product.
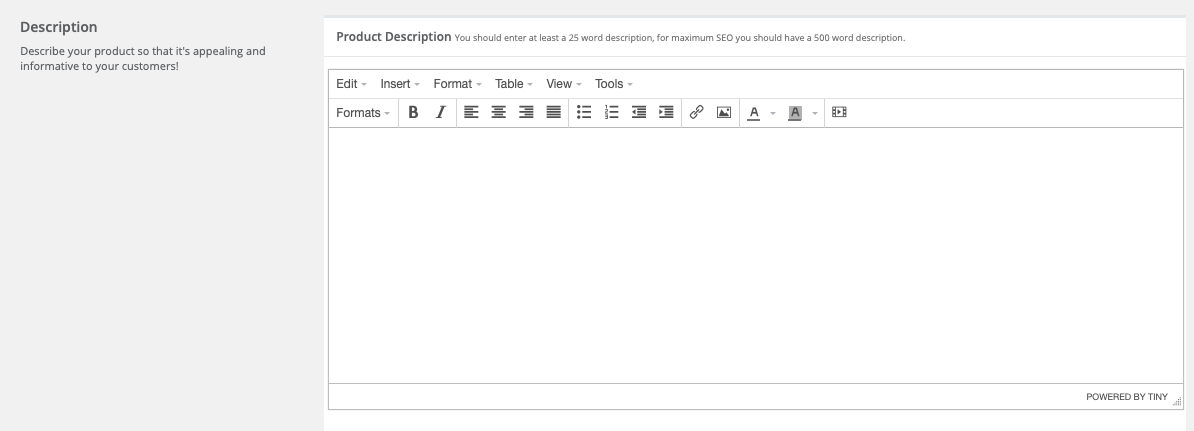
Then save the new product!
You can read about adding, editing and manageing products here.
Accepting payments
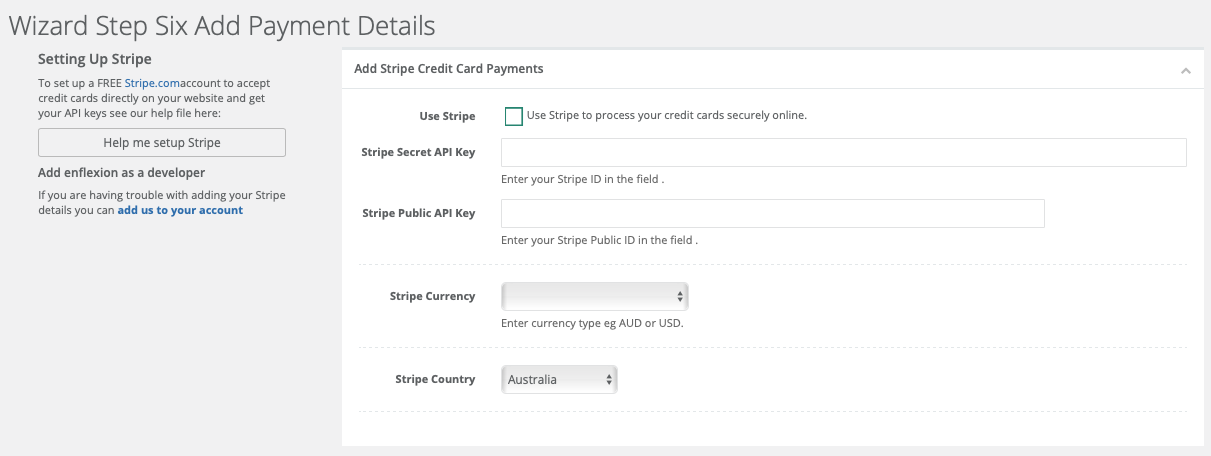
We integrate with a variety of payment providers, however we do recommend that you use:
Both are easy to set up and we have clear guides on the page on how to add the integration.
Editing content
Editing your website is very straight forward. When you are logged into your admin dashboard and view your website you will see red EDIT buttons.
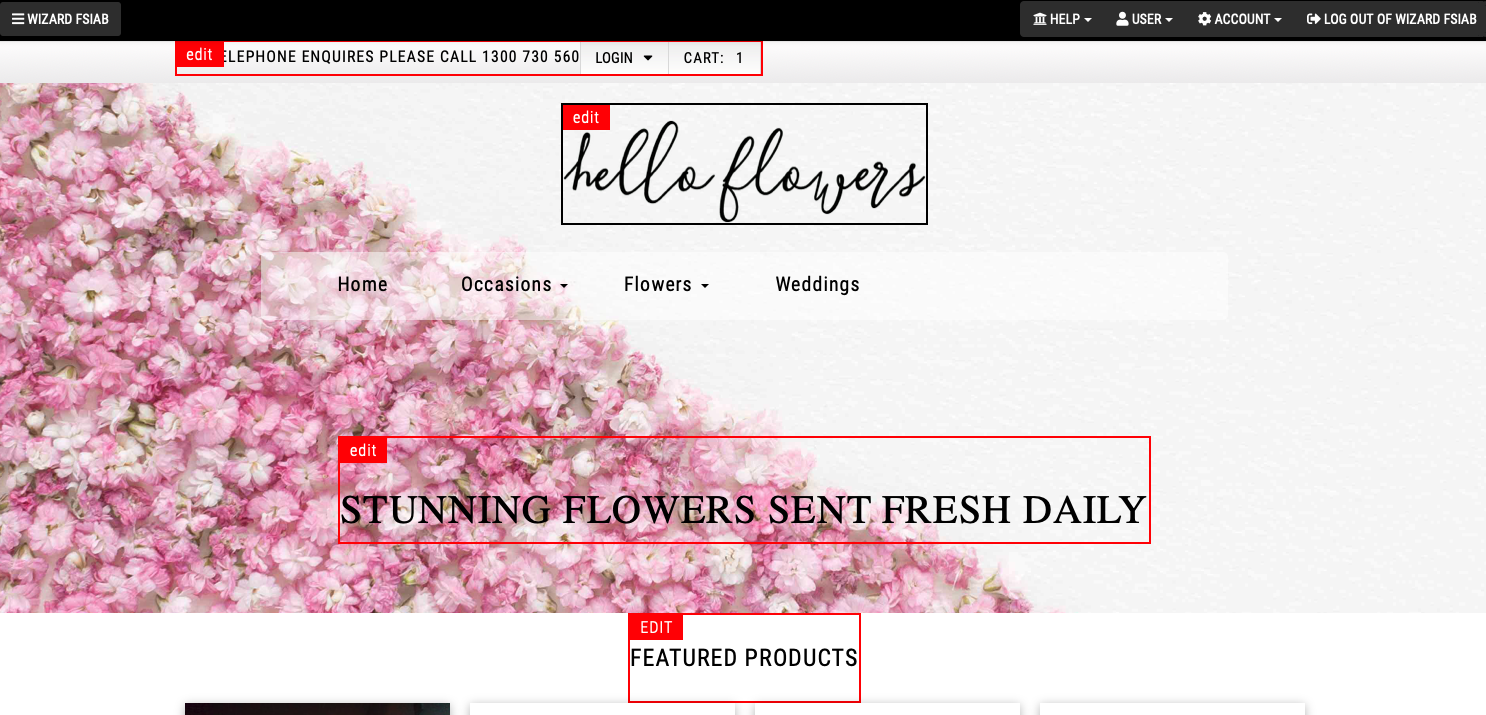
Click on one of these buttons to edit the component and then save your settings.
This also works with:
- Products
- Pages
- Banners
- Product Categories.
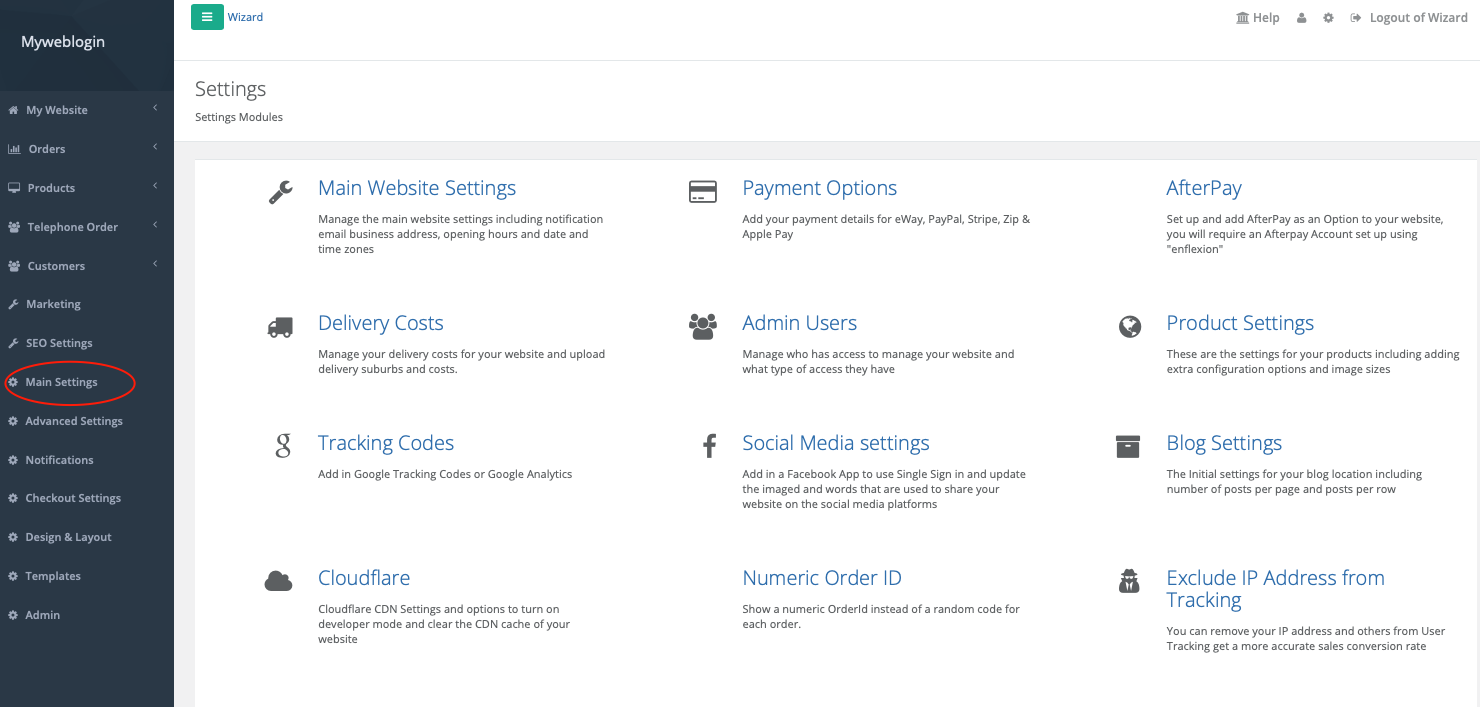
Advanced Options.
There are a great deal of advanced options for configuring your website and these can be found under Settings:
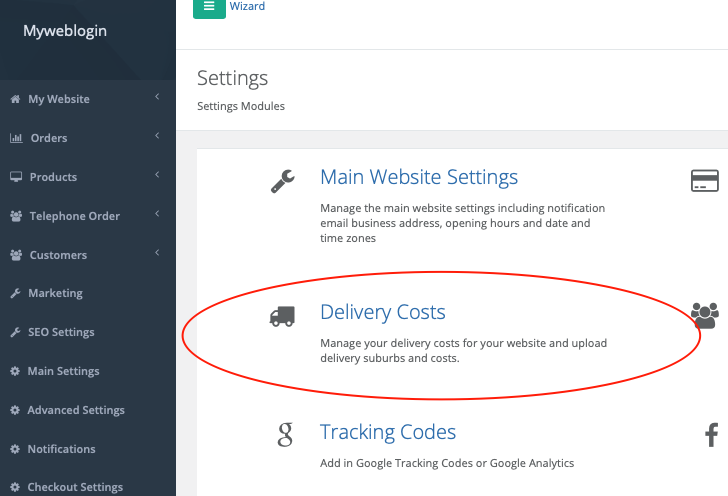
Shipping Costs
Setting up shipping costs is straight forward and can be done from:
Settings :: Delivery Costs
Customising the checkout experience
There are a number of options whcih you can configure for your checkout experience including:
- Pickup Addresses
- Authority to Leave
- Purchase Ordres
- Billing Company
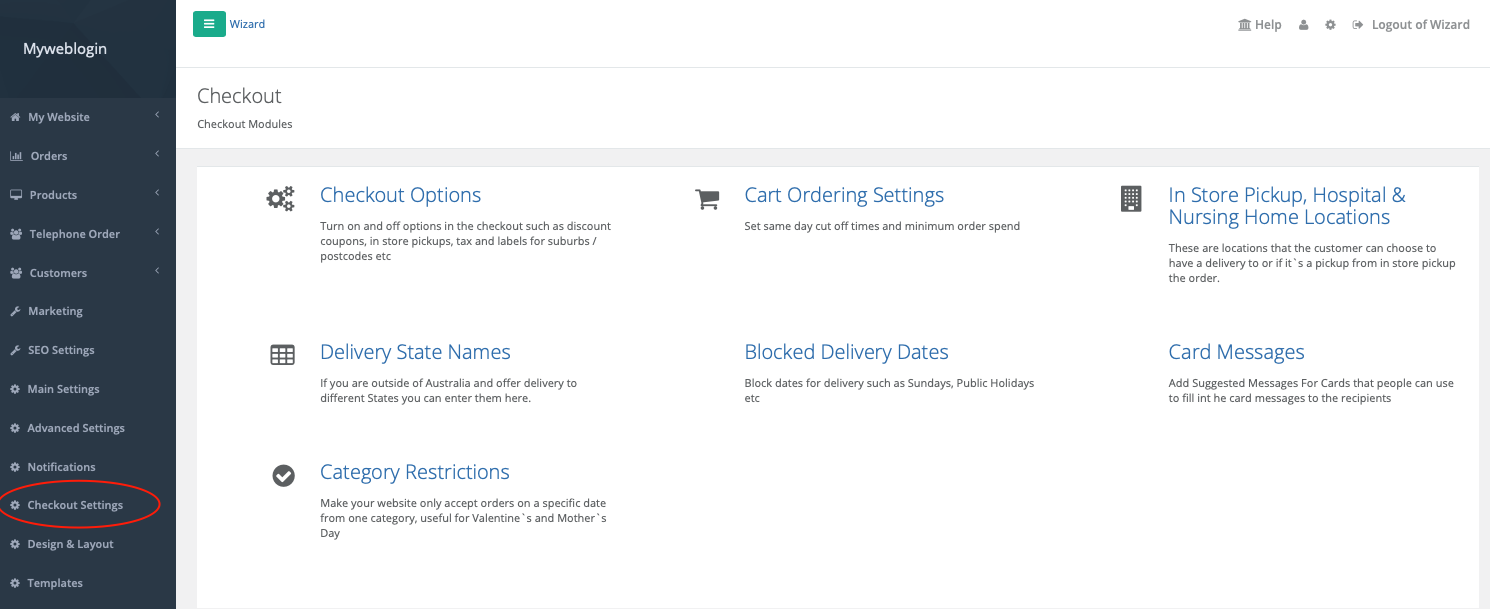
You can find these under the Checkout Settings Menu.
Support
We provide extensive email and telephone support and will quickly answer most questions you have about the site. You can also add a Support Request in your dashboard:
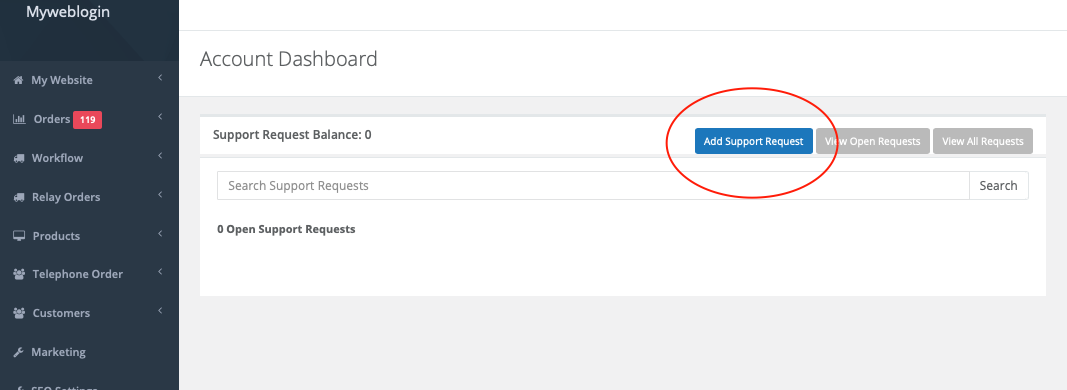
Time to go live
We generally find it takes a few weeks for customers to add all their content and products, at which stage you can send us the domain name login or we can point the domain name immediately or you can change the name servers to:
ns1.enflexion.com.au
ns2.enflexion.com.au
Added: 2020-3-31 and last modified: 2020-4-07- Accepting Payments Online
- Add a Team Member
- Add a Webpage
- Add an Image
- Add Blog Feed to Hompeage
- Add enflexion to your Stripe account
- Add Order Note
- Add Product Category
- Adding New Image Galleries
- Adding products to your product catalogue
- Block Delivery Dates
- Change Order Status
- Change the product Category on the Homepage
- Checkout Configuration Options Full
- Cloudflare WAF block Bots
- Code snippet to add the Google Reviews on your website
- Connect Your Instagram Account to Facebook and your website
- Content for Your Website
- Delete a Product
- Delete a Webpage
- Display a different number of products across on the homepage
- Edit a Category
- Edit a Product
- Edit Your My Web Login Email Address and Password
- Enhanced ecommerce tracking with Google Tag Manager
- Force https using the htaccess file
- Free Delivery for a Product
- Free Delivery for a product category
- Free Stock Photo Libraries
- Get Google API Key for Autocomplete
- How to add pick up time options for Instore Pickups
- How to enable same day cut-off time
- How to make Mother`s Day / Valentines Day Menu item Red or Pink
- Insert Delivery Pages Into Site
- Insert Delivery Suburbs
- Instagram Feed Template Code
- Integrate Your Instagram Feed on Your Website
- Introduction to Managing Products Online
- Inventory Management in Flower Store In a Box
- Legacy Custom Addons
- Main Menu Wizard
- Make product small name over one name
- Managing Admin Users
- Manual Order
- Meta Data Suggestions Tool for Products and Product Categories
- New Custom Addons
- OpenGraph Data for Social Media Sharing.
- Ordering Products in a Category
- Payment Options
- Receiving Orders By eMail
- Relaying Orders
- Renew Domain Name
- Restore deleted Webpages
- Sales Reports
- Same Day Cutoff Countdown
- Search For Code for Myweblogin
- Search Orders
- Setting Up an Accounts Customer
- Setting Up and Getting Started with Florist Workflow.
- Setting Up and managing Your Blog Technical
- Setting up Gift Vouchers with Flower Store In a Box
- Setting Up Special Events
- Setup and Link to your Stripe Account
- Setup In Store Pickup (Click and Collect)
- Shipping
- Shipping and Associated Costs
- Shipping Costs by Postcode
- Site Statements
- Sliced Bread Delivery Utility iPhone Application
- SVG Library
- Understanding Order Status
- Understanding Product Categories
- Using Coupons for Free Delivery
- Using Master Categories
- Vend Integration
- View and Edit Products
- View Dashboard
- View Live Website
- View My Web Login Logs
- View Orders
- Viewing and reviewing orders in My Weblogin
- Wizard DIY Instructions
- Your Product Catalogue
- Your website and navigation